|
GUIDE TO INSTALL EXTERNAL PORTS
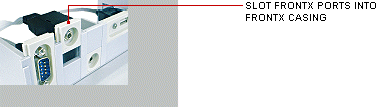
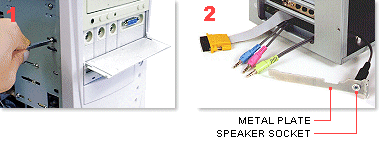
Diagram 1: Open the computer case. Remove a 5.25" drive bay cover. Install FRONTX Casing into the drive bay and let all the cables pass into the computer chassis. Screw the FRONTX Casing tight. Diagram 2: Choose a free PCI/ISA opening and remove the cover plate. Let all the cables pass through the PCI/ISA opening. If you are installing Multimedia Ports or Headphone Port, secure the Speaker Socket onto the Metal Plate with the ring nut provided.
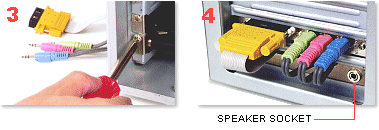
Diagram 3: Screw the Metal Plate onto the PCI/ISA opening. The Metal Plate should be positioned below the cables, to allow the cables to pass through the gaps created by the Metal Plate (the functions of metal plate are described in more details below). Diagram 4: Plug all the FRONTX Connectors into the respective computer ports and push the access cables back into the computer case. If you are installing Multimedia Ports or Headphone Port, plug your existing speakers into the Speaker Socket. Close your computer case. The installation is completed.
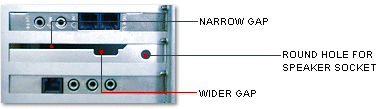
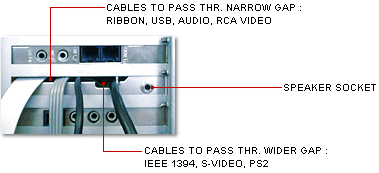
When the Metal Plate is fixed to the PCI/ISA opening, it leaves some gaps for the cables to pass through (refer to the picture above). The round hole is for fitting Speaker Socket.
Cables to pass through the narrow gap are; ribbon (game and serial), audio, USB and RCA video. Cables to pass through the wider gap are; IEEE 1394, S-video and PS2. |
|
|
| ||
|
| ||