|
GUIDE TO INSTALL INTERNAL PORTS
Diagram 1: Slot FRONTX ports into FRONTX Casing. Diagram 2: Open the computer case. Install FRONTX Casing into an empty 5.25" drive bay.
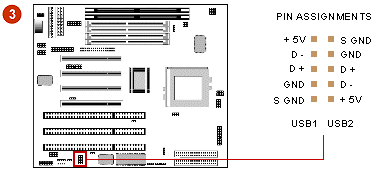
Diagram 3: Refer to the motherboard manual. Find out the locations of the required port headers and their pin assignments.
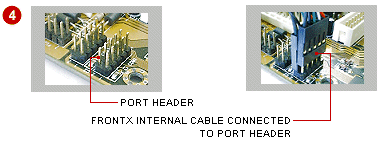
Diagram 4: Connect FRONTX internal cables onto the respective port headers. Make sure that all wires are connected correctly to the appropriate pins, i.e. the wire assignments (color coded) must match with the pin assignments. Close the computer case. The installation is completed. To find out the wire assignments of FRONTX internal port, and its more specific installation guide, go to our webstore, simply click on its "details.help" link - located just above its "but it" link.
The motherboard is the "backbone" of the PC where all things are connected; CPU, PCI card, harddisc, CD-rom, etc. The headers (pin-outs) for connecting internal ports are located on the motherboard.
You must always refer to the motherboard manual to find out the location of the port header, and its pin assignments (very important!!) Pin assignment simply tells which connecting point of the communication port the pin should be connected to. E.g. D+ pin of a USB header must be connected to the D+ point of a USB port.
The wires in FRONTX internal cables (except those using ribbon cable) are color coded. Each color is assigned with a particular function. E.g. in the USB internal cable, the green wire is the D+ wire, and must be connected to the D+ pin of the USB header.
To match with the pin assignments of port header, wires can be shifted within the connector. The connector can be replaced if necessary, depending on the layout of your motherboard header. more information
|
|
|
| ||
|
| ||


